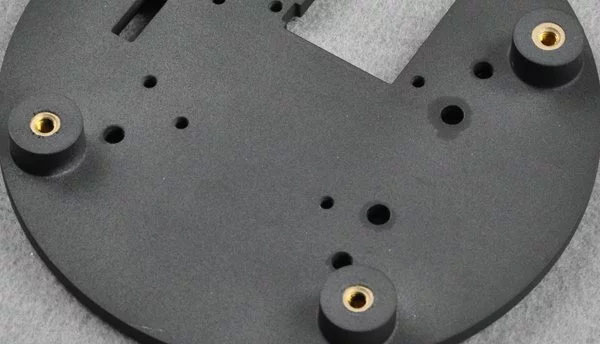
The insert molding process is somewhat similar to conventional injection molding since it involves melting and injecting molten plastics into a mold. However, plastic insert molding involves loading inserts in the mold as the molten plastic floats into the mold cavity. Here is a stepwise to the plastic insert molding process.

1. Load Selected Inserts into the Mold
It would help if you considered the positioning of inserts within the molds when designing the molds for the process. It helps to ensure the insert maintains its orientation and position throughout the molding process. There are two ways of loading inserts into the mold: “automated insertion” and “insertion by hand.”
Two Methods for Loading Inserts into the Mold
Automatic insertion is more precise, consistent, and efficient. It uses robots or automated mechanisms that can resist high-temperature levels to load insert components into the mold. As such, manufacturers often benefit from faster turnaround times since the computerized machines are fast and can mold more parts per hour.
On the other hand, Insertion by Hand/Manual Insertion is ideal for low-volume injection molding since it involves loading the insert components into the mold by hand. Moreover, this procedure is more common than automated since the operator is always present to carefully inspect, package, and assemble the injection mold components, incurring lower additional costs. However, the insertion-by-hand technique may lack high precision and repeatability.
2. Inject the Molten Plastic into the Mold
You must use an injection unit to deposit the molten material into the mold under high pressure. The applied pressure forces the molten plastic to fill the mold evenly. As such, it pushes out air through the vents present in the mold, ensuring the plastic bonds firmly and entirely to the inserts.
3. Open the Mold and Eject the Molded Part After Cooling
While the molten plastic has filled the mold evenly, it would be best to maintain a set temperature to allow consistent solidification. You must maintain a holding pressure to mitigate potential shrinking effects while preventing backflow into the barrel. However, the mold opens when cooled and allows the removal of the insert-molded part.
4. Separate the Molded Part From the Sprues
Molded parts often get attached to the sprues that helped form them. These sprues are like structures or frames that ensure all components of the molded part are made. You must detach the molded part from the sprue to use the part. However, be more careful when separating the sprues to avoid damaging or affecting the molded part.
5. Post-Molding Operations
Plastic molds often require certain post-processing operations after molding before they are ready for the market. Amongst the common post-processing treatments widely used for inserting molded components are:
Deburring: It involves using deburrers to remove excess material affecting the molded part’s physical properties.
Heat Treatment: Heat treatment is effective for removing internal stress that can compromise the quality of the molded part. It usually involves subjecting the molded component to a temperature 10-20 °C lower than its deformation temperature or higher than the service temperature.
Humidity Control: This treatment involves bathing molded parts in hot water of 80-100°C. It insulates molded parts from the air, increases moisture absorption, stabilizes size, and prevents oxidation.


